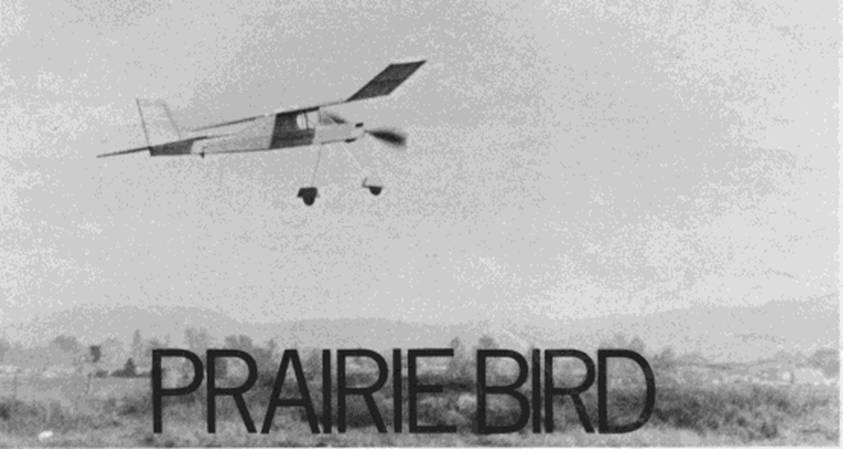
Here we see our Prairie Bird supporting our contention that it is a snappy flier as it climbs out on a very successful flight.
The Plan Page
[ Home ] [ Previous Plan Pages ]
[ Special Things ] [ Earl Stahl Plans ]
gt-hunter1@home.com
Here we see our Prairie Bird supporting
our contention that it is a snappy flier as it climbs out on a very successful
flight.
BY BOB PECK . . . famous small kit manufacturer designs a snappy little rubber-powered free flight for the new Embryo event and like all his designs it performs with the best! It's a fun or contest winning plane for all.
Embryo endurance contests are popping up all over the country. Started by the Flying Aces Club in Bridgeport, Conn., it looks like one of the best things that has happened in a long time for the modeler who likes to build simple models that fly well.
The Prairie Bird was my first attempt at embryo endurance and has proven to be quite successful with many contest wins. The Prairie Bird, if built to the plan, meets all the rules plus the maximum of 9 bonus points. At least twenty Prairie Birds have been built to date by all ages and degrees of experience, all of which flew well including a man who had never built a model before and came out to a local meet. The model went out of sight on his second test flight. Sorry to say we never saw him again.
The Prairie Bird is of standard rubber model construction and if you are an experienced modeler about all that you need to read is covering the stabilizer. The rest of this article is for those not familiar with building, rubber models. Start by taping the plan to the building board and cover it with wax paper or plastic wrap so that the parts will not stick to plan.
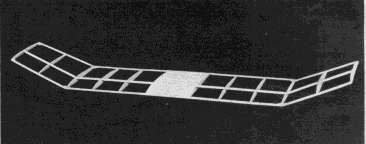
Build the wing by first cutting out the ribs and pinning the parts in place over plan. Glue all joints except at the dihedral points. Leaving the center panel pinned down raise each tip 1-1/4 inches; add gussets and finish gluing joints.
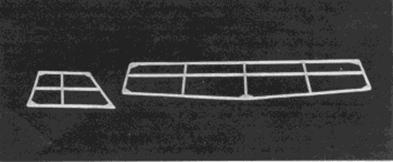
Cover the top center section with 1/32" sheet balsa. There is not much to be said about the rudder and stabilizer except pin the parts in place over the plan, glue and remove when thoroughly dry. Please note: when pinning parts down do not run pins through wood. Place pins on each side at angle to hold parts down.
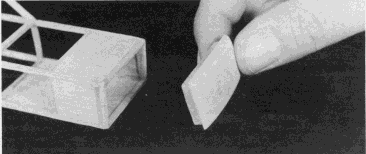
Build two fuselage sides and cut about half through at points A on each side. Now pin down the sides over top view and add 1/16" square cross pieces from the front to point A. Next glue the back edges of the fuselage together and check that both fuselage sides slope equally to the back. Finish adding cross pieces, sheet balsa parts and wing hold-downs.
Neat and clean, no complex curves, simple lines that make the Prairie Bird a must for every serious or fun flier who just wants the kicks.Cover the wing, stabilizer rudder and fuselage with Japanese tissue. Water shrink the tissue on all parts except the stabilizer. I do not water shrink the stabilizer as a flat section of this size is very likely to warp. It may not look quite as nice but is better than a stabilizer shaped like a corkscrew. Now paint all parts with 2 or 3 coats of Sig Lite-Coat thinned down 50 percent with Sig thinner. I use Sig Lite-Coat because it has an inhibitor which retards shrinkage and chances of warpage. With small light-weight structures such as an Embryo model there is little resistance to the stress imposed by the tissue. A badly warped model is very difficult to adjust and is likely not to perform well. I only say likely because after building models for nearly forty years I have learned that sometimes the right combination of warps will counteract each other and fly fine.
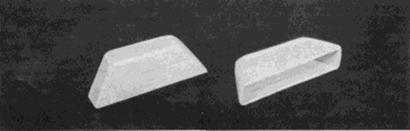
Finish the fuselage by adding landing gear, exhausts, windshields and wheel pants. Make wheels by gluing together 2 sheets of 1/32" balsa. Turn sheets so grain is 90 degrees to each other and cut out a rough circle. Using a Moto -Tool, mount the balsa circles on a small mandrel and using a piece of sandpaper turn a couple of 3/4 inch diameter wheels. Glue a piece of 1/16" O.D. aluminum tubing x 1/8 inches long in the center for a hub. These wheels are quite light-weight but if you are in a hurry use any 3/4 inch wheel of reasonable weight.
I also like to add a stripe down the side, made from colored tissue to dress up the model a bit.
The nose block and prop assembly are all that's left to build. Laminate sheets of 1/16" balsa as shown on plan, sand sides of block until it is a tight fit with the fuselage. It is important that the block fits tight or it will fall out during the glide and cause the model to come down rapidly. Drill a 1/8 inch diameter hole for the Peck Polymers bearing and glue bearing solidly in place. Bend prop hook from 1/32" diameter music wire; the diamond shape hook is best as the rubber band will pull to the center for smooth running.
Before assembling the prop, check to see which blade is heavier and sand the surface of this blade until it balances. A balanced prop is very important for best performance as it delivers more power and during the glide free wheels easier and reduces drag. Several props have been tried on the Prairie Bird and the best 1 have found is the 6-inch Peck-Polymer type.
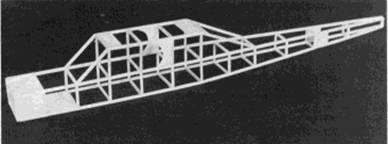
Series of construction shots starting with the wing At ton which has 1/32" balsa sheet covering
on center section and ending up with the easy-to-build wheel pants. Build light.Adjusting and flying the Prairie Bird is easy and 2 or 3 test flights will usually do. First make a motor of one loop 15 inches long, 1/8 rubber and with rubber motor in model balance at point shown on plan. To balance the model add clay to front or back as necessary. Check to see that the wings are not warped; if warped remove by redoping and holding opposite warp in wing while it dries.
The model is now ready for its first test flight. Make tests with low power of about 100 to 200 turns. Watch carefully both the power flight and glide as you want to adjust for the best of both for a real contest winning model. I adjust the Prairie Bird to turn left in both power and glide flight, but I have seen others trimmed right and for right, left flight. Down-thrust has been built into the model and usually all that is needed is a little turn in the rudder. First adjust for power then trim for smooth glide by adding or removing clay from the nose or tail. Good luck with your Prairie Bird and watch it carefully as there is a great tendency to go to the great land of lost models. I am presently building my third!
|
Embryo Endurance Rules 1. Not over 50 sq. in. monoplane or 70 sq. in. bipe wings. 45 sq. max. larger wing area. Stab area not to exceed 50 percent of wing area. 2. Fuselage volume to enclose a space 1-1/4 x 1 1/2 x 3 in. or larger. 3. Wing and tail to be built up, tissue covered on both sides, no films. 4. No folding props. All models rubber powered only. 5. Model must R.O.G. from card table top UNASSISTED from a 3 point rest. 6. Landing gear legs must have two 3/4 in. dia. wheels or larger. 7. Four attempts for three official rise above table top level flights. 8. Highest flight total plus bonus wins. Fly off to break .a tie. 9. A bonus for the following details will be given: 5 seconds for a raised cabin or windscreen with open hole and headrest. 3 seconds for three dimensional wheel pants. I second for three dimensional exhaust pipes. |
Scanned from January, 1979
Model Airplane News
[ Home ] [ Previous Plan Pages ] [ Special
Things ] [ Earl Stahl Plans ]