|
A 40 Minute Record Breaker How to Build and Fly a High-Powered
By CHARLES CHILVERS and ROBERT L. BROWN
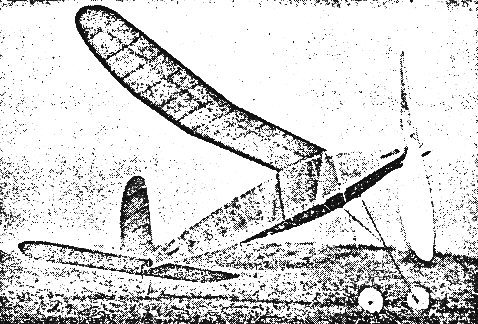
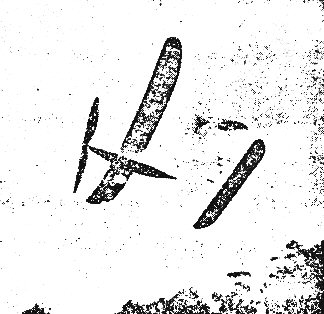
THIS model was first designed and built during the early part of 1937. A fine performer in either calm or windy weather it had an average flight of about two minutes; the original model (old N.A.A. weight rule) was lost from sight after six minutes and never recovered. From these same plans the model shown was built. Just like its predecessor, except for the wing airfoil section (changed to Grant X-8), it too was a beautiful flyer. It had a tremendous, almost vertical, climb followed by a very flat glide, sensitive to every thermal current. This record model was lost after a flight which lasted forty minutes, going out of sight after breaking the Long Beach, California, record for fuselage models on August 20, 1938. Since the plans are very clear the building instructions will be kept as brief as possible. By enlarging the plans three times with dividers a full size drawing may be made. Fuselage The fuselage is built up of 1/8" square hard balsa. Construct the top and bottom directly from the plan; the sides are not built first as is usually done. Make the top first and while drying work on another part of the model. After the top is dry, set it aside and construct the bottom, fairing the two longerons into one as shown on the drawing. Starting at the nose of the fuselage, cement in all the uprights which form a rectangular cross-section. After joining the tail longerons together finish placing all the uprights in place. Since the fuselage is made as a complete unit the tail boom is next detached. Put the bulkhead in the boom and cement in the rear hook (.040 diameter piano wire). The nose block is cut from a medium grade block of balsa 1/2" x l" x l". Drill a hole in the block and glue washers on either side, as shown on drawing. Wing Make the wing as one complete unit, forming the polyhedral angle after construction is completed. Cut all ribs of 1/16 inch medium grade sheet balsa, except five which are of 1/8 inch flat; trim and notch for leading and trailing edges and place on the spar. Pin leading and trailing edges in place and cement every rib well. Cut tips of 1/8 inch soft sheet and cement to end rib. After wing is dry trim leading edge, trailing edge, and tips to shape. Form the polyhedral angle as shown, noting extra center section brace. Tail Unit The elevator and rudder are made in the same manner as the wing, using wood sizes and grades as specified on the plan. After the elevator and rudder are covered and doped cement them directly to the tail boom; elevator is set at zero degrees incidence, and the rudder's trailing edge is set approximately 1/32 inch to the right (looking at the model from the tail). Propeller One of the most important parts of a good flying model is the propeller. It must be perfectly balanced and running smoothly in order to obtain good flights consistently, so be sure to take your time and do a good job on this vital part. Cut blank as shown on drawing, from block measuring 1-1/2" x 2" x 16". Taper blades from 5/16 inch at hub to 1/16 inch at tips. Cut blades to 1/8 inch cup maximum at the one half-way point, diminishing to symmetrical cross-section tips. Covering and Doping Sand all parts well before covering, in order to remove "burs." Due to the new ruling that timers cannot follow models when timing, it is best to make the total bottom surfaces, as well as all lateral surfaces of the model, a color easy to see. Purple or dark blue is suggested for this purpose. Cover top surfaces with either yellow or white in order to see the model readily after landing. Use dope to apply paper and always run the grain of the paper the long way in order to eliminate excessive sagging. Cover the total under-surface of the wing first, sticking the paper directly to the under-side of each rib in order to obtain the best airfoil, then covering each top section separately. Spray the entire model with water, and paint with clear dope to which has been added two or three drops of castor oil per ounce of dope. This not only gives a glossy finish which glistens in the sun but it also makes the paper more flexible. Dope the propeller and nose plug until a high gloss is obtained. Sand with a finer grade of sandpaper between each coat until "ten nought" is reached. A natural wood filler is obtained if the dust left after sanding with fine sandpaper is left on while the next coat is being applied. Miscellaneous Attach free wheeler and hook to propeller as shown. Glue hooks on nose plug, fuselage and tail boom. The hooks used are the common "hook and eye" type obtained at any five and ten store. Bend landing gear from .040 diameter piano wire and attach as shown. Cement wing mounts directly to fuselage as indicated. Flying Use rubber spaghetti tubing on rear hook and propeller hook. Attach rubber strands on both hooks, using special 1/4 inch diameter rubber tubing on front hook. This special tubing gives the model a smoother running propeller as it reduces wabbling caused by the rubber strands knotting up at the hook. Lubricate the rubber well with a mixture of one-half liquid soap and onehalf glycerine. The original model had twenty-two strands of 1/8 inch flat brown rubber on its record flight. Attach the wing with 1/8 inch flat rubber; making sure the wing has about three degrees positive incidence. Test glide the model first and make minor adjustments before attempting power flights. The model flies opposite torque, both under power and in the glide. Scanned From June 1940
|