|
A High Performance How You Can Build and Fly the Class By LEO VARTANIAN
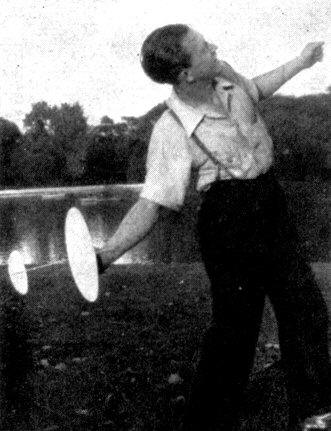
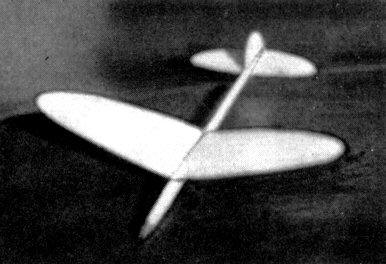
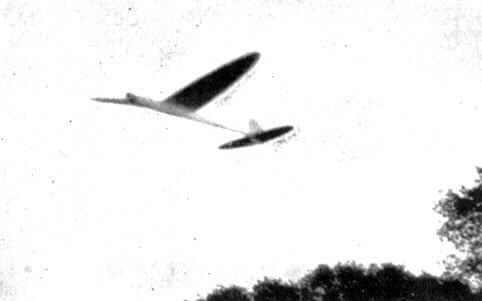
IF YOU are one of many model builders who have not enjoyed the fascinating sport of indoor model glider flying due to lack of plans for this type plane, the little glider presented herein should be enthusiastically received. This little model, though simple enough for any novice to construct satisfactorily, will appeal to the most particular of experts, due to its fine design and high performance. At record trials held last winter by Chicago Aeronuts, this glider amazed modelers by recording the hitherto-unheard-of time of 54.3 seconds. Best unofficial flight was 55.7 seconds. highest ever recorded by an indoor Class A glider! Although primarily an indoor glider, it may he flown outdoors on calm days with most gratifying results such flights average about 45 to 50 seconds. Flights of many minutes duration, frequently out of sight, have been obtained when flying outdoors. By carefully following the plans and instructions any model builder can build this Class A glider: a definite threat in any contest. Wing and tail surfaces should be made from very light balsa, preferably 4 to 5 lb. weight: the fuselage is made from fairly hard, straight-grained balsa. All wood used should he quarter-grained if possible. Wing As the wing is the most important part of the completed model, extreme care should be taken in making this part. Obtain a piece of balsa, of specified weight, 3/16" thick, 3-1/2" wide and 12" long. Begin by making a cardboard pattern of the complete wing outline and tracing around it on the balsa. After cutting and sanding the outline to shape, sand it down to 5/32" thickness. Taper the wing from this thickness at the center to about 1/64" at the tips. The next step is sand the upper airfoil curve into the wing. After this is done sand in the undercamber; this is most easily done by wrapping the sandpaper around a small bottle. Do not use sandpaper any rougher than No. 1 as it will make scratches that cannot be removed. After the wing is completely sanded it is given two coats of wood filler. Sand in between coats and give a final sanding with 13/0 polishing paper. Dihedral is 1-3/4" on each side. Fuselage The fuselage is made from fairly hard, straight-grained balsa. Lay out correctly according to plans. Notice the cutout on the bottom rear of the fuselage to accommodate the stabilizer; also note the crossectional patterns on the plan. Follow these as close as possible. After the fuselage is correctly shaped, it is also given two coats of wood filler and sanded with 13/0 polishing paper. Tail Surfaces The tail surfaces are made of 1/16" sheet balsa of the correct weight. Cardboard patterns should be used to get correct outlines. The top and bottom rudders are made in one piece and are cut apart when completed. Grain of the wood in the rudder should run up and down. The completed tail surfaces should be about 3/64" thick when completed: they should be finished in the same manner as the wing and fuselage. Assembling The first step in assembling is to make sure the positions where the wing and stabilizer are glued have no incidence: This is very important. The next thing is to cement the stabilizer in place, making sure that it is correctly aligned. When this is fairly dry, glue on top and bottom rudders, making sure they are perfectly lined up. After these are dry cement the wing in place, using two coats of cement. When the glider is completely dry the completed model may be waxed for a super-smooth finish. Adjusting and Flying Although adjusting an indoor glider for correct flight is a fairly touchy job, the following tips and instructions should enable the average modeler to obtain satisfactory results. Adjusting the model for flight is begun by first balancing it on the finger tips at the point designated on the plan, adding clay until it balances with the nose slightly down. Then warp a slight left turn into the rudder and test glide it. The ship should glide smoothly to the floor. If it stalls warp the trailing edge of the stabilizer on the right side down. Do not add clay to cure a stall unless absolutely necessary. Keep gliding the model and increasing the power with which you launch it, taking out the stalls as described. When it reaches an altitude of about twenty feet and glides smoothly in left circles of about 30 to 40 feet in diameter, it is ready for a real throw. The plane should be thrown in the same manner as a baseball, and up at about a 55° angle, with a slight right hank. It should go almost straight up, snap out at its maximum altitude and start to glide. If it has a tendency to go over on its back before snapping out of the throw, warp down the stabilizer trailing edge; if it banks excessively in the glide, warp up the right wing trailing edge. Here you have a glider you can be proud to fly at any indoor contest. Scanned From September, 1941
|