|
Latest in Float Design Now is the time of year that a young man's fancy turns
-- to seaplanes.
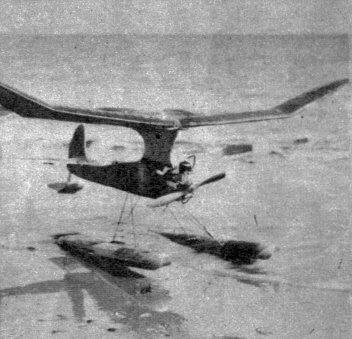
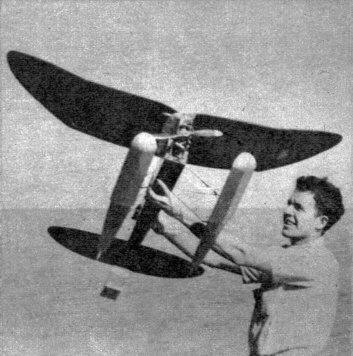
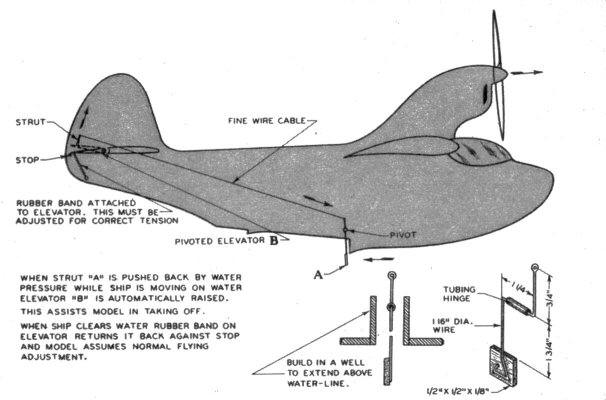
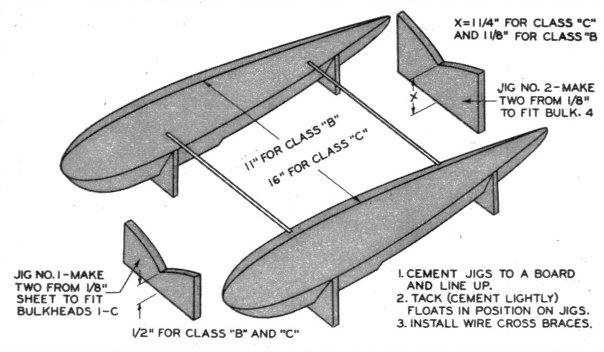
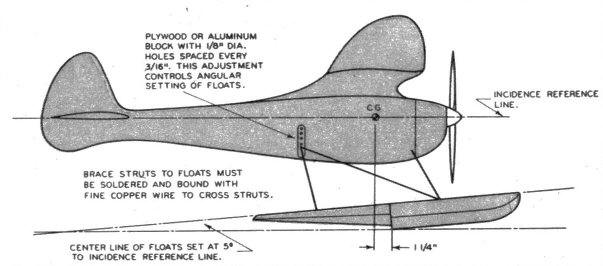
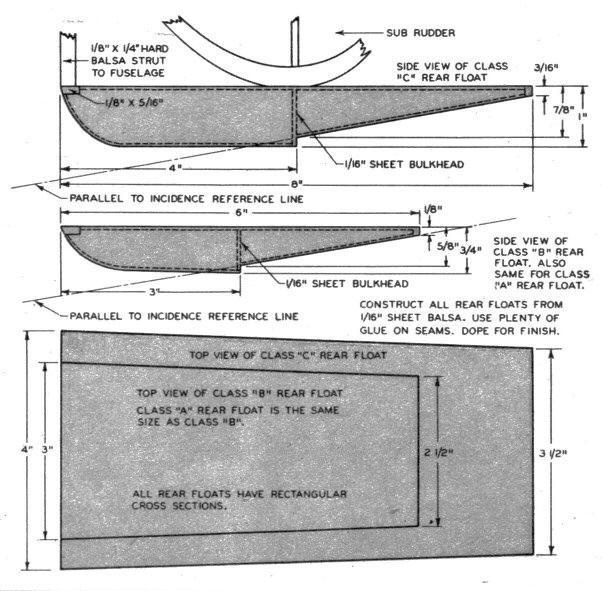
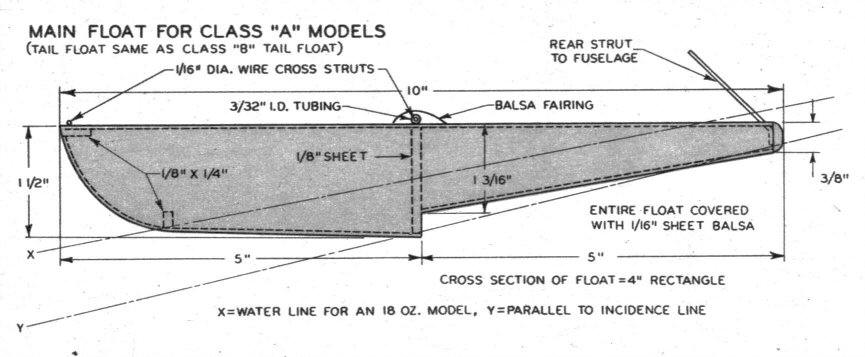
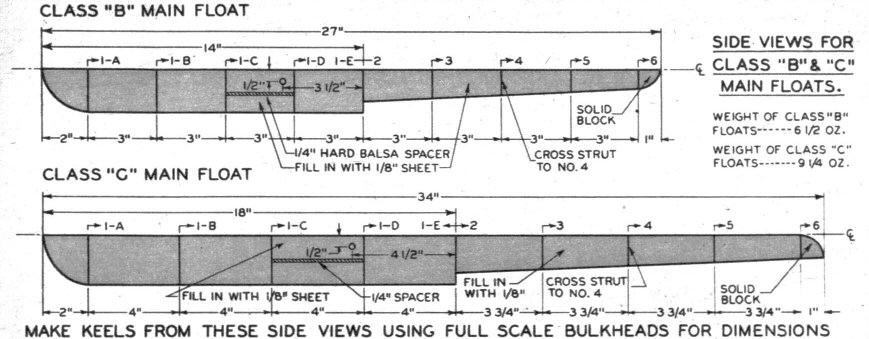
AT every hydro meet there are always those who don't get off -- in fact, the great majority of those who enter fail to make the official flights. Your writer had this experience at the 1940 meet, for he thought, as do a lot of fellows, that all you had to do was to put a pair of floats on your ship, and if it floated it would get off. The contrary seems to be true, for even though the ships are record-breakers on land, they often won't get off the water. After one disastrous day at the meet, ducking the models and cleaning out the motors, taxiing along the water for twenty seconds, et cetera, a very determined and wiser contestant prepared for the next meet weeks in advance. Some of the ideas dreamed up were good and, along with some ideas gleaned from NACA reports and talks with engineers at the field, floats were designed and built. The floats were mounted in a reverse angle contrary to all ships we had seen, for the idea in mind was that the ship had to be practically pulled off the water to keep it well trimmed and also to prevent the ship nosing over, especially on landing. There was still a little trouble, for the ship would not take off every time. The floats were then moved forward, and with this set-up it took off every time. We found that with the floats so far forward the tail would sink in the water, so a small tail float was added. Then came the experimenting. The main thing in mind was a fast, sure take-off, so different angles for the floats were tried. As the angle was increased, the take-off run also increased. After ten degrees we decided it was useless to go any further, so the angle was decreased below the five degrees we started with. But after all these tests it was found, by pare accident, that the five degrees was the best. For rough water it was recommended that the angle be increased to seven degrees to allow the front of the float to clear the chops. All the ships which had the above ideas worked swell in the contest. They won three of the four first places, a free round trip by plane to the Nationals for the writer for high time in the meet. Since the construction of the floats follows the trend, we will not go into it in detail except to enlighten on the. points which are important. The floats are constructed upside down with the keel perpendicular to the work board. Since you have two floats, it is a good idea to make them both at once, so instead of cutting out one part, make two of each. The floats were covered with sheet while fastened to the board to eliminate chances of their getting out of line. The jigs shown are worth their weight in gold, for they allow you to line up the floats perfectly and will stop a lot of trouble before it gets started. All parts should be sanded very smooth before the covering is applied, which in this case was bamboo paper doped four times and then waxed. The three small floats arrangement was a copy of the rubber jobs and worked beautifully. Getting back to the floats. On flying boats such as a lot of fellows use, a. very simple idea was tried. It consisted of a drag strut extended back to the step with an arm extended into the fuselage connected to the stabilizer with a piece of string. A rubber band was connected to the stabilizer to pull it back in position after the ship had taken off. The basic idea was simple, for since water has roughly eight hundred times the density of air, the strut will drag back while in the water, but once in the air the rubber band will pull the stabilizer back into position. Simple. isn't it? But it really works. For more detail on this, consult the sketch shown. Now for the testing. It is important that the ship he very stable on the water. To help in this problem, small water rudders are attached to the rear end of each float. These will enable the ship to taxi straight on the water and to get off better. It is best to try a little low-power taxiing while adjusting these rudders until the old crate is going straight. After this has been done. you are ready to try a few take-offs. Try opening up the motor a little and getting the ship off. You may find that the ship will oscillate or wallow a little. This is caused by too little rudder area, so add a few square inches of area in tip rudders on the stabilizers. These may be seen in the pictures. It is very easy to get the ship flying if the above procedure is used -- assuming, of course, that it has been flight-tested on land and proven itself satisfactorily airworthy before the addition of floats.
Scanned From August 1942 |
||||||||||