|
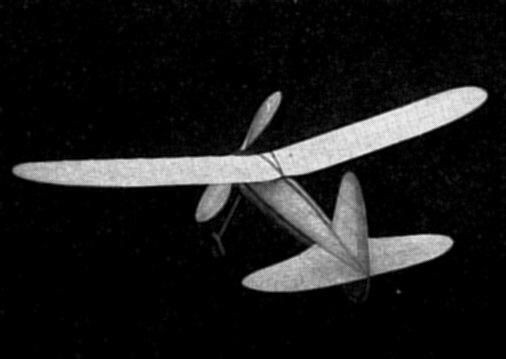
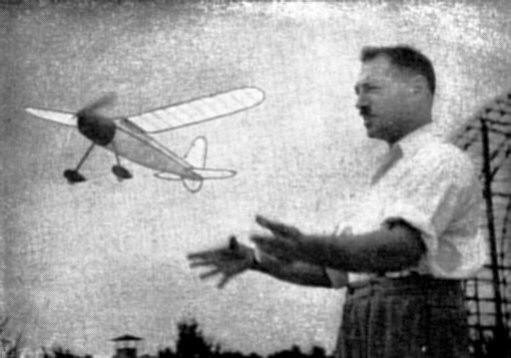
THE CABINEER A new method for construction of monocoque By LOUIS GARAMI
ALMOST every model builder has an imaginative hour when he uses pencil and scrap paper rather than balsa wood. "What a plane I drew up last night!" he shouts to a friend, waving a slip of paper, and for the next three hours a spirited discussion ensues that can be heard for three blocks. Being always a sucker for sheet balsa construction, one of my attacks of daydreaming centered upon a monocoque sheet balsa body. "Looks like sheet balsa poured over a bunch of hot air," said somebody, looking in through the nose of the finished model. And he was nearly right, because nobody could make a better guess as to, how it had been made. I have been using this method and procedure of construction for a period of several months now, and have built at least a dozen models along the same lines, mainly to gather helpful suggestions which are needed whenever a new idea is introduced. For this reason I advise a study of the instructions before any material is secured. Much of the success also depends on the type of wood used for the body, which is stronger per weight than any other in existence. The rest of the model is of conventional construction. On account of its lightness and strength, excellent performance and long life are assured. BODY The selection of balsa sheets used for the body blanks is important. Even grain with no weak spots or streaks when held up to the light is the first requirement. The wood should be soft and pliable, therefore no quarter-grained stock can be considered. The thickness of the sheets may be 1/32" or 1/20", depending on how soft the wood is. The first step is to cut out two of each blank carefully and sandpaper the edges even in pairs while they are held together either by hand or pins. Now separate them and apply a coat of dope with a brush to the inside of each pair, in order that a left and a right side may be produced. After ten minutes of drying a second coat of dope is applied in this same manner. In most cases two to three coats of dope are sufficient to make the blanks curl up so that the depth of the curvature is at least 3/8". Allow a twenty-minute drying period before measuring for correct depth (3/8"). The foundation of the whole body is the lower part, which is made out of the two No. 1 blanks. Pin and cement the lower edges by easy stages with as little forcing as possible. The angle at which they stand to each other is about 70 degrees. If a good job is done the seam, looking over it from the front, presents a perfectly straight line. It is of no advantage to wait for the glue to dry any longer than specified here, in order to preserve some flexibility until a new part is added. This will eliminate a lot of unnecessary forcing, since the seams can change their angle slightly without springing apart. Wait only three minutes and proceed by spreading cement on the longerons and pinning them into their places, the top line of the blanks. Next the rear hook is cemented in, followed by the front former FA, which is forced into place after the front of the longerons are cut 1/16" to make room for it. Now the half formers FB are added. A small length of 1/8"square should be placed above them, to serve as a spreader until the whole thing dries, and then removed. Blanks No. 2 are cemented together by the same method as No. 1, and placed promptly on the already-finished boatlike creation. Each side is fitted and pinned carefully. In all operations avoid using an excessive amount of cement or smearing the cement on the wood, as it will hurt the appearance of the finished product. Next the two half formers FC are added. Blanks No. 3 are fitted and cemented separately. First the bottom and rear part is fastened, then the front part is bent over the top of former FA. The roof of the cabin is supported by bamboo struts. Use thick celluloid for windows. Get the cowling started by cutting out the two formers FE and FD and cement the four 1/8" square pieces into their respective places. Cover all around with 1/16" sheet balsa if no paint or dope is intended for it, otherwise a little thicker stock, like 3/32". Before the cowl is attached to the body, the holes can be cut into all formers. Save the square piece cut out of FE. Use it as a pattern for the back of the nose plug. Small bushings and large copper washers make a good bearing in both the prop and nose plug. Any proven freewheeling device on the prop is well worth the trouble. The landing gear is bent out of .040 wire and cemented right behind the cowl. Next the streamlined struts and the pants with the balsa wheels in them are added. The wire-to-wood contacts should be glued several times into a firm joint. WINGS AND TAIL The outline of the tail surfaces is cut out of 1/8" sheet balsa, except for the rudder tab, which is of 1/16". Instead of ribs, just glue in 1/4" high pieces and sand the whole unit into a streamlined section. When covering, even the rudder tab should be covered over with tissue and doped, to prevent it from cracking during adjustments. Cement the four separate surfaces right on the seams of the body. The wing is built in two halves and coupled together by the center section, while the tips are raised 2" high. The small end ribs are cut down to shape after the spar has been set in to meet the bamboo tip. To improve its appearance, the model can be decorated with strips of tissue, but avoid covering or painting the whole body. Twelve strands of 1/8" rubber are used for power. The correct full length is tied into one -loop and folded into six smaller loops. With the aid of a weighted string (use a small nut or bolt), it is pulled over the closed rear hook. FLYING The wing is held on the cabin roof by rubber bands. The rubber can either encircle the whole body or just go over the top of the wing and be held by wire hooks. Adjust for a good glide by raising either the leading or the trailing edge of the wing slightly. For the first powered flight -- fifty winds -- set the rudder to the right 1/8 ". Gradually increase to capacity, which is two hundred and fifty by hand and four hundred and fifty with a winder. Fully wound, it is easy to reach a hundred and fifty feet altitude, and in case the rubber breaks, you can still laugh at those who would laugh at you. Scanned From November 1938
|