|
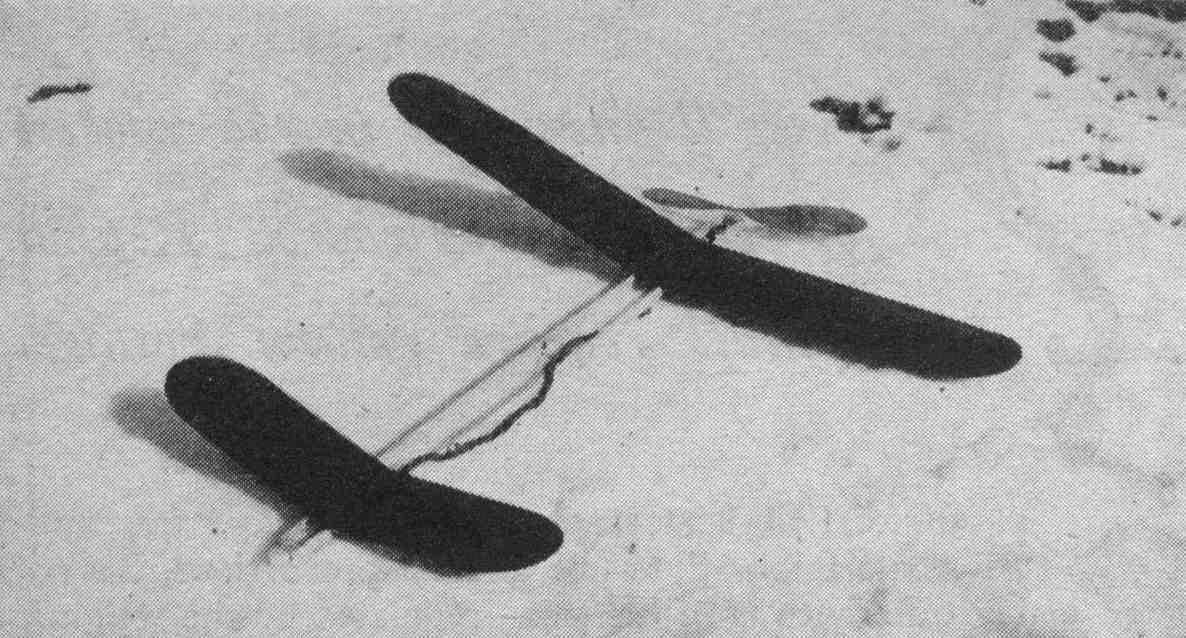
The INSUROR
A BEGINNER'S FAITH in modeling is usually strained when his new model refuses to fly. Enthusiasm about his new hobby drops with each unsuccessful attempt to fly it. It takes a good flight to fully restore his confidence. Unfortunately, new models are usually rather slow to show results when handled by beginners, and a simple, easy-to-fly model should always be kept in flying trim for just such occasions. So, we suggest that you build this pusher model as a sort of insurance against the time when you'll be discouraged by bad results. It will be a tonic for low spirits. The single pusher is the ideal model to provide such insurance. The cost is small and you'll get paid full value when it is necessary to cash in your policy. The single pusher offers the best in flying for the least in building. I've seen crude pusher models built by the most inexperienced beginner turn in some exceptional flights. Our model club used to specialize in holding contests for single pushers. We allowed the entrants a wide flexibility in rules - single or double-surface wings with unrestricted range of sizes. Practically all the beginners were able to turn in flights of 50 to 60 seconds. And many of these flights were hand-wound. When the weather was good it was not unusual to lose several models with flyaway flights. The simplicity of the single pusher kept interest among club members running high. Even after the beginners were qualified to tackle a more difficult type of model they continued to spend part of their time building and flying single pushers. An afternoon of pusher flying gave them much valuable experience and enough enthusiasm to carry them over the rough spots in their modeling careers. So take time out from your more difficult models and build up your enthusiasm with a few single-pusher flights. BOW FRAME The frame is built from two pieces of 3/16 x 5/8 x 28-1/2" balsa. The two pieces are joined at the ends and separated in the center by wire strengtheners. This peculiar shape of the frame accounts for the descriptive title. The two fuselage members are tapered from 5/8" at the center to 3/8" at the ends. The simplest method of doing this is shown in the drawing. Pin the two pieces together so the ends overlap 3/8". Then cut away the excess wood -- using the edge of the one piece as a guide when cutting the second piece. The outside edges of the two pieces are rounded with knife and sandpaper while the pieces are still pinned together. Next cut the front and rear parts of the frame from 3/8" balsa. These are labeled A and B in the drawing of full-size parts. The frame members fit into these pieces -- securing them with cement and thread. The two frame members are held apart by three wire strengtheners. These are bent from heavy wire (C. D. and E). These wire strengtheners are cemented and threaded to the inside of the frame members. The next step in the frame construction is to bend the propeller shaft and rear hook. The shape of these are identical. The rear hook is inserted through the balsa piece (B) and cemented. The shaft is inserted through piece (A). A washer is cemented to the front of (A) which serves as a bearing for the propeller. Elevator incidence blocks (F), shown full-size, are cemented to the top of the frame members 3-1/2" from the front. WING Cutting ribs is at best a tedious process -- and making them accurately, as they should be, makes the process even more tedious. The easiest way we know to cut ribs is by using a metal template. This can be cut front a piece of scrap metal. A time-saving trick in using a metal template is to bend the edges of the template into a prong which will fit into the sheet balsa and hold the template firm while the rib is cut. With the rib used in this model the set-up is ideal. Instead of cutting away the metal to provide a notch for the top and bottom spar, merely bend the excess metal to form a prong. In addition to speeding up rib cutting these prongs will insure a uniform size of notch for the spars. Pin the ribs together after cutting and sand them to the same shape. And at this time make sure that the ribs are 3/32" at the rear ends and notched 1/8 x 1/8" at the front edge. The wing is assembled in one piece. You'll probably find a simple, full-sized drawing to be worthwhile in getting a well-shaped wing. Build the wing flat and then break the spars and leading and trailing edges and add the 3" dihedral to each tip. The 1/16 x 1/16" bamboo tips are semicircular and are reenforced with pieces of 1/8 x 1/8" balsa. ELEVATOR Since the elevator is a small version of the wing the same methods of construction should be used. A metal rib template is as useful here as it was in the wing. Notice that dihedral is given to the elevator -- an important item in the pusher's stability. PROPELLER Follow closely the method of laying off the propeller block. Mark the block carefully with pencil and ruler. The excess wood is cut away as indicated in Step Two of the drawing. Next, the blades should be cut -- carefully cutting away the balsa down to the diagonal lines, which are indicated on the ends of the block. Using sandpaper, put a slight "hollow" in the blades. Wrapping the sandpaper around a small bottle will insure a smooth, concave blade. Now turn the propeller over on the other side and cut the blades down to thickness -- ranging from 1/4" at the center to 1/16" at the tips. The exact thickness of the blades is unimportant, as long as they are uniformly tapered. The propeller is shaped, using the blade pattern as a guide. COVERING This operation should cause no trouble if you follow a few simple directions. Cut four pieces of tissue each half the size of the wing. The grain of the tissue should run lengthwise. Next, iron all the wrinkles out of the tissue. Prepare the wing for the tissue by coating liberally with banana oil. Allow this coat to dry completely before attaching the tissue. Now give the wing another coat of banana oil. First attach the tissue to the center rib and the end rib, carefully smoothing out the wrinkles. Now attach the tissue to the leading and trailing edges, painting banana oil over the top of the tissue and rubbing it through with your finger tips. It will not be necessary to attach the tissue to the tops of the ribs. But it will be necessary to attach it to the bottom of each rib to maintain the shape of the wing. If you're still inexpert at attaching tissue with banana oil, we'd suggest using a few drops of cement at the more difficult parts, such as the bamboo wing tips. Spraying the tissue with water will shrink it so tightly that it must be securely attached. A coat of dope should be given after the water spraying has completely dried. If necessary, banana oil can be used. But it would be advisable to thin it a trifle with acetone -- which is available at most drug stores. ASSEMBLY The wing and elevator are attached, using 2 rubber bands for each. The elevator is mounted on the incidence blocks, while the wing is mounted flat atop the fuselage. 8 to 10 strands of 1/8" rubber are necessary, depending on the weight of the model and the skill you've displayed in building the model. The formula for determining the amount of rubber for a pusher is to add additional strands until the model climbs steeply. A steep-climbing spiral is an important part of the single-pusher design.
MATERIALS
-G. S. L. Scanned From May 1937
|
||||||||||||||||||||||||||||||||||||||||||||||||||||||||||||