|
THE SPEE DEE By Alan D. Booton
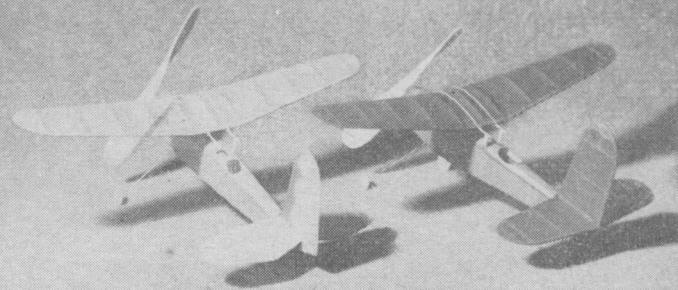
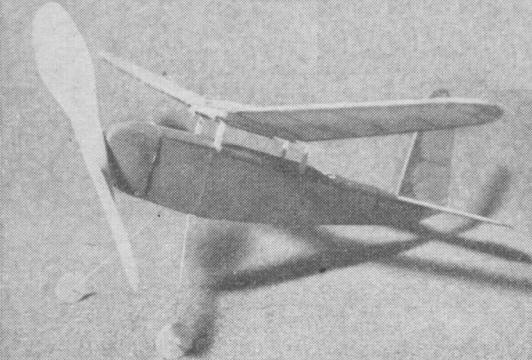
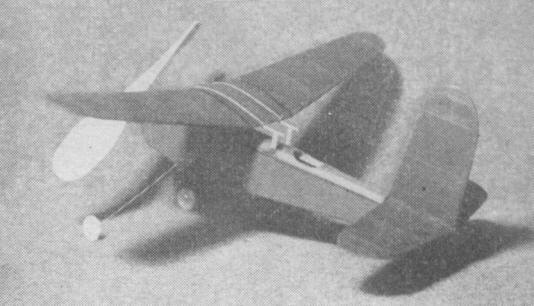
THE primary interest of the novice builder is to build a model that will fly. Usually the haste in assembling the chosen design spoils the possibilities of good performance and a fretful aftermath ensues. The novice has seen that particular design do well in the hands of another, perhaps younger builder, and wonders why his will not equal the rival model's performance. Care and patience are of the utmost importance in building accepted designs, and then there is the prudent matter of careful adjustment in trial flying before making showy flights. The Spee Dee makes an excellent design for the novice who has built several small models. It is not an experimental model, because the author took care of that in successive steps before presenting the final design. CONSTRUCTION Assemble two fuselage sides and then space them with the formers and corresponding bottom spacers. Cement the 1/32" bamboo stringers in place, then the 3/64" bamboo wing rests. No spacers are used between the rests. Carve the nose block and hollow it slightly as shown after cementing on the 1/16" sq. pieces. The shaft hole must center as shown. The wing is built by pinning the leading and trailing edges over the drawing and cementing the ribs and tips to them in the accepted manner. After the parts are dry, unpin all but the center section and crack the spars at the point shown and raise the tips one inch, then recement the cracked places. The tail surfaces are the same shape as the outer portion of the wing and the tips are alike. The difference lies in the plain stock ribs. Build the stabilizer as a unit. The propeller design is an important factor. Follow the given design carefully and be sure to balance and polish before using. The freewheeling is very simple and should need no explanation, other than it is a boon to a long glide. The landing gear is bent from #10 music wire to the dimensions shown. The wheels should have bushings cemented in them. Use any color scheme desired but apply it carefully. Cover the wing with six pieces of tissue and the top of the fuselage one panel at a time. Now assemble the model completely. Cement the tail surfaces in place and power the model with three strands of 1/8" flat rubber, allowing for about 2" of slack. Lubricate the motor before winding. Strap the wing on with two small rubber bands and place a 1/8" incidence block under the leading edge. The model is now ready for trials. Wind the motor by hand until the model will barely take off. Gradually increase the number of turns when adjusting improves the flights. If the model climbs too fast and stalls, move the wing back or lessen the incidence and vice-versa. If the model falls off one wing, extend that side of the wing farther unless the wing is warped. Continue to adjust the model until it will climb in a tight spiral almost straight up for a hundred feet and then level out. Memorize the best adjustments and mark them where possible. The model should last until it is literally worn out. MATERIAL LIST
Scanned From May, 1938
|
||||||||||||||||||||||||||||||||||||||||||||||||||||