|
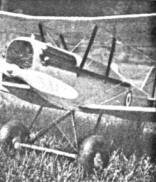
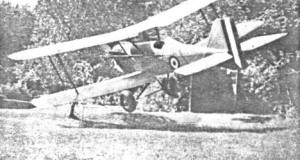
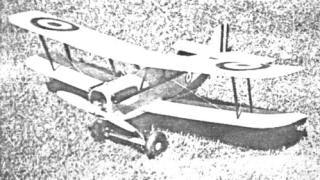
A GAS POWERED SE-5 How You Can Build an Exact Scale Gas Model By ARTHUR KRONFELT
HERE is a flying gas model for the World War model fans. The SE-5 is one of the few biplanes that will fly well. The wingspread is only 48 inches but it has enough wing area to take care of any 1/5 or 1/6 HP. motor. The model described here has a Cyclone "D" and weighs a little over three pounds ready to fly. The wings are demountable, making the model easy to carry. It was not necessary to make any changes in the length of the landing gear, size of tail surfaces, amount of wing dihedral, prop diameter, airfoils, number of wing ribs or any other details. Anyone that has built a gas model before should not have any difficulty in constructing this model; but be sure to study plans carefully. Fuselage First it will be necessary to enlarge the plan four times to get a full size plan. Obtain a 10" x 36" board to work on. The fuselage longerons are 3/16" square spruce. The horizontal and vertical cross members to the rear of cockpit are also 3/16" square spruce. All other cross members aft of the cockpit are 3/16" square hard balsa. The tail post is not mounted until after the stabilizer has been assembled on the fuselage. Place the fuselage sides over the top view of the plan. Cement cross members in place. Cut out the bulkheads from 3/32" plywood (bass or birch). The bulkheads are cemented to the sides of the cross members, not butted as in most cases. This makes a much stronger joint. Next cut out the fuselage formers from 3/32" balsa, and cement to fuselage. The stringers taper from 1/16" x 1/4" to 1/16" x 1/8". The 1/32" plywood fuselage rounding is butted against top side of the longerons, flush with the sides of the fuselage. The motor is mounted as it comes from the factory. This becomes part of the motor mount. Other motors will require a motor bed. The dummy radiator is made of white pine and ordinary house screen. The aluminum cowl, dummy motor banks and exhaust pipe (soft balsa) may be made later. Landing Gear The landing gear frame is made in one piece of 3/32" music wire, with the break in the rear cross section. The axle travel guides are also 3/32" music wire. They are wired and soldered to the landing gear frame. The wire frame is wire-wrapped and cemented to the fuselage. The spruce struts are grooved to fit over the wire. The rubber shock-cord combined with 4-1/2" air wheels will ease hard landings. Battery Box The battery box is made of 1/8" and 1/4" hard sheet balsa. Cement the box in the fuselage after the model is completed, so it may be moved forward or aft to balance the model. The batteries are held in the box with rubber bands. Tail Surfaces First, build the stabilizer and slide it into position on the fuselage. The stabilizer should have one degree positive incidence. The fin and tail-skid frames are all of balsa. Sheet aluminum or aluminum wire can be used for rudder hinges. All surfaces should be covered and doped before securing brace wires. Center Section This portion of the plane is made entirely of hard balsa. The lower wing stub spars pass through the fuselage. The rear spar will have to be notched to fit over the longerons. The center-section struts are made of spruce. Be sure all struts are cemented firmly. Brace wires must be anchored securely. Wings Use hard balsa for wing spars, leading and trailing edges, and medium balsa for ribs. The upper and lower wing panels are the same except that the wire fittings and strut slots are on the under side of the upper wing and on the upper side of the lower wing. Place the fuselage on a flat board (leveled) with the top longerons level. Place blocks under the lower wing tips to get the required dihedral. Now make up the landing wires to exact length. The flying wires have turnbuckles so when the wing panels are assembled to the center-section all that is necessary to rig them is to tighten the flying wires. Covering The model may be covered with China silk or light bamboo paper. Water spray and dope and be sure surfaces do not warp when drying. Two coats of clear and two coats of colored dope should give the model a neat appearance; spray the colored dope if possible. The model is colored gray with black struts, exhaust pipe; and blue, white and red insignias. Adjusting and Flying The model should be glide-tested before attempting to fly it. The glide should be slow with a fair rate of sinking speed. This is due to the larger amount of drag present than in modern streamlined models. With the motor throttled to half speed, hand-launch the model into the wind. It should make a slow even climb. Remember a few minutes spent adjusting your models will mean more hours flying them. Happy Landings! Scanned From April 1939
|