The Plan Page
[ Home ] [ Previous Plan Pages ]
[ Special Things ] [ Earl Stahl Plans ]
gt-hunter1@home.com
How You Can Build One of the Most Realistic, Stable and
Efficient Flying Scale Models Ever Designed
A Flying Ercoupe In Miniature
By SIDNEY STRUHL
|
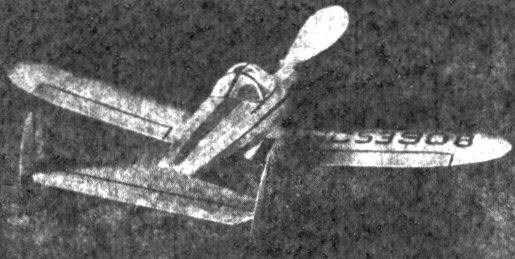
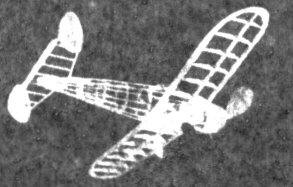
Twin rudders and large stabilizer insures steady flight |
The tricycle gear provides smooth takeoffs and landings |
Well proportioned for long flights |
|
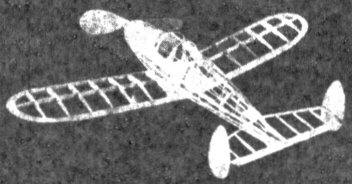
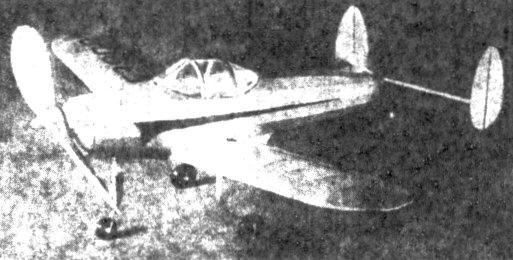
The frame work is simple yet strong enough to withstand
many strenuous flying hours |
OVER the horizon comes the new "ERCOUPE," the lightplane that
can be flown with utter simplicity and handed with extreme ease under any
conditions and by any pilot.
Invading the $2,000 class. the Engineering and Research
Corporation of Riverdale, Maryland has brought some startling developments for
the lightplane enthusiast, that heretofore were unheard of in all preceding
light and sportplanes. Just by looking at the Ercoupe you can see how radical it
is, with its tricycle and twin rudders. It truly looks more like a modern
pursuit ship than a cracker-jack lightplane.
The Ercoupe has amazing stability -- it will not get out of
control. Even with the wheel full back, straight flight can be maintained or
turns performed at will. It is absolutely impossible to spin the ship. The quick
take-of run, fast climb and high sustained cruising speed of the Ercoupe
provides point to point transportation which will surprise arid please the
private pilot. On the ground, as in the air, the plane handles with great ease,
no nose-overs are possible even with full application of the hydraulic brakes.
The structure of the Ercoupe is all-metal as is the covering
of all but the outer wing panels. The use of corrosion- resistant aluminum
alloys in structure and covering brings to the lightplane pilot the
dependability and freedom from maintenance of the large transport planes.
Powered with the Continental A-65 engine, the plane has
remarkable performance with surprising economy. The maximum speed is 117 m.p.h.
and the cruising speed is 105 m.p.h. Cruising range is 350 miles and the landing
run is only 200 feet. Fuel consumption is but 4 gals. per hour.
The ERCOUPE lends itself very nicely towards a flying scale
model because of its simplicity of construction and adjusting for flight. A
beginner who has only built one or two models before should have no trouble
whatsoever in building the model.
Now for the construction. We shall start with the fuselage
since it is the more complicated of the parts and one likes to have the hardest
job done quickly.
Fuselage
Two types of basic construction may be used in constructing
the fuselage One is the half-shell method and the other is the master-stringer
method. We shall describe both methods but the beginner should find the
hall-shell method much simpler and easier.
As for the master-stringer method, You will note that the one
stringer that is shown in grain and marked MS is of 1/8" square balsa. This is
the master stringer and the entire fuselage is built on these two stringers. You
will have to cut the bulkheads out in one piece each and mark their positions on
the two master stringers. The bulkheads are then cemented in their correct
positions. After they have set, the remaining stringers are inserted in their
correct positions. This may sound simple but it is quite difficult to get the
fuselage lined up with this method.
The half-shell method is far simpler although it does take a
little more time. First cut out a complete set of fuselage bulkheads. You will
notice that only one half of each bulkhead is shown, except bulkhead A-A. Simply
make two sets of the bulkheads shown.
Now join the two pages of the magazine and pin the bulkheads
at right angles to the plans, making sure each former is in its correct
position. Of course you cannot pin bulkhead A-A on the plan since it is cut slut
of one piece of wood, not two as the other bulkheads are.
Now that you have the bulkheads pinned onto the plans you may
proceed to construct the half of the fuselage right on the plans. Install, first
of all, the 1/8" square strip marked MS then add all the other stringers which
are 1/16" square balsa strip. Be sure that you extend the stringers 2-1/4" past
bulkhead B-B so you can put A-A in later on. You should have now completed
one-half of the fuselage, the right half looking from front to rear.
After you are sure that the cement has dried, remove the side
and cement the other halves of the bulkheads to their mates. Now add the
stringers to this side, then A-A and the tail block which is carved from very
soft balsa. Cut the piece marked L-S from hard 1/16" sheet and cement it in
place between A-A and B-B. The front landing strut is now bent from 0.028 music
wire and glued very firmly in place.
A small piece of soft balsa is carved to shape and then
cemented behind H-H.
Although covering the nose with 1/64" sheet balsa is
optional, it is advisable. It is necessary around the cockpit however.
The nose block is now shaped from a hard balsa block and a
small cube of balsa is glued to the rear. It fits in the square hole located in
bulkhead A-A.
Now that the fuselage is complete, sight it down for any
twists and correct them if there are any.
Wing
The wing is exceedingly easy to construct and the only thing
that need be done is to watch out for warps. You may build the half wing shown
right on the plans and the other half may be traced and then reversed.
Pin the leading edge, trailing edge, wing tip and wing spar
directly on the plans after you have shaped them out of the correct size balsa.
Now proceed to cut out the necessary ribs from medium 1/16" sheet balsa. You
will require two of the tip ribs and fourteen of the standard ribs. The ribs are
now inserted in place and cemented.
After the cement has set on the joints, remove the half wing
and check for any warps. Then proceed to make the other half wing in exactly the
same manner.
When both halves of the wing are complete, block them up
1-1/2" at each tip so that you will have the correct amount of dihedral and
cement the center very firmly. The center section may now be covered with 1/64"
sheet balsa as shown in the plans for added strength.
Now that the wing is complete we may now build and add the
two rear landing struts. Shape the two struts from hard 3/16" sheet balsa then
cement them in their correct. positions on the third rib from the center, making
sure that they are perpendicular to the ground when the wing has the correct
dihedral. Bend the wire axles front 0.028 music wire and cement it very firmly.
Give the joint between the wing-rib and the balsa strut several more coats of
glue just to make sure.
The wing may now be covered with tissue or the new silk-span.
The author used Silk-span and found it quite good to work with especially on the
fuselage where it could be wet with water so that covering the compound curves
of the fuselage became very easy.
After the wing is covered it is cemented in the correct
position between B-B and E-E. The leading edge is then cemented to the bottom of
B-B and the trailing to E-E. A small soft balsa block is now carved to shape to
keep an even flow around the fuselage beneath the wing. If you know how, this
may he just a piece of bamboo paper and serves the purpose just as well and
saves weight, too.
The fuselage is now covered. If you use tissue paper you on
will have to use many small pieces; if you use Silk-span you can cover the
entire fuselage with only two pieces of paper, one above the thrust line (MS)
and one below.
Tighten the covering on the fuselage and the wing with water
and then treat it with two thin coats of clear dope and two very thin coats of
colored dope. Coloring is optional although silver will give the Ercoupe a
metallic finish.
Tail Surfaces and Propeller
The tail is just as simple to make as you can imagine. Two
rudders are required anti they are simply cut out of 1/32" sheet balsa and
smoothed down with fine sandpaper.
The stabilizer is constructed right on the plans and is made
from 1/16" flat balsa strips. The leading edge is sanded round at the front and
the trailing edge is tapered at the rear similar to the trailing edge of the
wing. Cover the stabilizer before gluing the two rudders in place.
Cement the stabilizer in place and make sure that it is
perfectly lined tip and without any warps
If you are a beginner and feel that you cannot, as yet, carve
a "decent" prop, you may buy a ready-carved balsa prop of 9" diameter and cut it
down to 7-1/2" and then put the shape in it. The reason for cutting it down is
because most "store" props have too low a pitch.
If you know how to carve a prop then we can only say be
careful and take your time during the carving, so that you have two matched
blades that balance perfectly.
It is advisable to employ a free.-wheel in the prop for
longer flights. These may be purchased from your local dealer.
The prop shaft is bent from .028 wire but make sure that the
hoop is small enough to fit into the small square hole in bulkhead A-A.
Flying
The author's ship flew perfectly "right off the drawing
board" except for a small adjustment in the rudders for a turn.
Six strands of 1/8" flat brown rubber was used as power in
the original model and the ship was very fast in flight, giving a spectacular
climb at the beginning of each flight. If you build your Ercoupe light enough
(and it call be done) you can get away with using only five, or even four,
strands of 1/8" flat rubber.
For balance use a bit of clay to adjust the model in flight.
The model should be flown against torque; that, is a right circle looking from
rear to front. If, under power, the model dives down to the. left (with torque)
shave the prop down to a 7-1/2" diameter instead of an 8" diameter as called for
in the plans. Of course for maximum duration of flights use a good winder and
rubber lubricant.
On the whole, the model is very simple to construct and fly,
but if you do run into any difficulty please don't hesitate to write the author
care of this magazine, enclosing a self-addressed stamped envelope.
Scanned From February 1941
Model Airplane News


[ Home ] [ Previous Plan Pages ] [ Special
Things ] [ Earl Stahl Plans ]