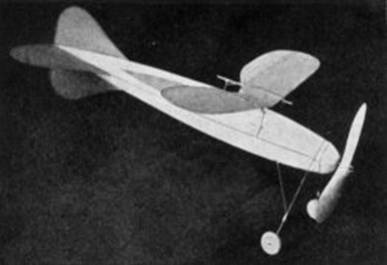
 The all-balsa finished model with fuselage of diamond cross section and demountable, adjustable, parasol wings. |
 The plane has sleek lines and is well proportioned for stability at high speeds. |
The Plan Page
[ Home ] [ Previous Plan Pages ]
[ Special Things ] [ Earl Stahl Plans ]
gt-hunter1@home.com
How to Build the Arrow Speedster
A Model That Is Very Easy to Build and Which May
Be Converted Into Other Types of
Planes by Changing the Wings
By LOUIS GARAMI
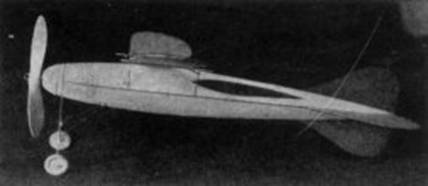
The all-balsa finished model with fuselage of diamond cross section and demountable, adjustable, parasol wings. |
The plane has sleek lines and is well proportioned for stability at high speeds. |
A SPEED model contest is no doubt the most interesting and exciting event of any model competition. This is easily proven by one look at the size of the mob which gathers quickly at such an occasion, scenting some real fast flying or a lot of juicy crack-ups.
In sharp contrast to the milling crowd outside the ropes the number of contestants is very small; only a few hardy individuals preparing to show their skill at high speed destruction.
Having been present at every contest in and around New York I had the opportunity to question numerous builders about the cause of their staying away from the speed contest. Thus the final analysis gave me a very good idea just what the trouble was.
The average builder thinks that a speed model has to be a gloriously streamlined affair to be able to fly fast. The few plans published so far were not practical nor easy enough to take a stab at by the average builder and when one watches a super streamlined model beat itself to pieces, the conclusion is quickly drawn.
In plain words; not enough fun for too much work. And so the problem was plainly written; requiring a foolproof speed model, as foolproof as any other type, which does not need tricky adjustments, easy to build and will give as much fun as one really expects out of a model.
I have built six different models in the spring of 1937 refining and improving here and there but always keeping the main idea - that is to make it super light. All kinds of bodies were tried before the one used here which tips the scale at .25 oz. and holds 32 strands of 1/8" rubber with ease. Every part of the model was a separate experiment until all but the most practical bit the dust.
For a final test, the model was built by several others. The performances of these were so pleasing that within a week eight more entered for an informal contest. The rules of this contest required N.A.A. cross section R.O.G. for 88 feet distance. In a perfectly calm weather the winning time was .9 second while the others tied and bunched up around 1 second.
The main features of this model are, the ease with which it takes off the ground and the perfectly straight course it flies without climbing. In case the builder gets tired of this sort of flying, a built‑up wing instead of the balsa one will convert the ship into a sky rocket with a climb of 100 feet in 2 seconds.
Read the construction notes carefully because it contains many valuable hints and information.
Body
In order to get the finished body weighing .25 oz. use the lightest balsa you can lay your hands on. First cut out the four blanks and sandpaper them alike in a bunch secured with pins. Do not distort the outline in the procedure because it may result in a crooked body with wavy seams, putting the tail surfaces out of line. Mark off the lines 1" apart as shown on the plan and proceed to make a nice fat cement mark on each with the glue stick. When the cement marks dry, they sort of cup the body sides and also strengthen them a lot being on the inside of the body. First the two halves are pinned together individually and compared with each other as to the angle they are set at. Then glue is put into the seams from the outside and set aside to dry for about 20 minutes.
To complete the body put the two halves together using plenty of pins; even a strong rubber band to hold the nose from springing apart until the cement takes hold.
Watch the seams of the body during all operations and make sure that they are straight.
Smooth out the whole outside, including the seams, with fine sandpaper and proceed to line the inside of the nose with 1/8" sheet balsa. This lining is unusually long. Its purpose is to hold the nose plug very firm, thus preventing prop oscillation at high speeds.
The nose plug is of hard balsa carved to blend into the shape of the body and coated with cement. Make it fit fairly tight to avoid trouble after a few flights due to a wobbly nose plug.
The rear hook is bent out of piano wire. The .034 size is strong enough to hold 16 strands of 1/8" rubber but above this .040 should be used. To put the rear hook into the body, puncture a 1/16" hole on each side as shown on 1/2 scale side view and wiggle the hook through the hole until both ends are out. Cement several times to a firm joint.
Use hard balsa for the propeller. Do not carve the blades too thin. About 1/16" is all right at the tips. Coat the whole prop with cement several times until it gets shiny. The safety hook on the prop shaft is very essential because lubricated rubber has the habit of climbing up and off the hook just when it is wound for a rousing flight.
The landing gear is the conventional wire type. Tie the joints with thread and glue at least twice. Standard hardwood wheels are used with 1/16" O.D. aluminum tubing for bearings.
Wing and Tail
All the surfaces are of sheet balsa. Use soft and unwarped stock. Sandpaper smooth and cover both sides with tissue paper and dope over it again. This will prevent the wood from splitting and strengthens the same. The tail surfaces are glued to the body seams. An occasional check-up in the first hour of drying will assure a permanently lined up job.
The wire wing struts are all the same size placing the wing at no incidence to the thrust line and elevator. In case a slight adjustment is needed simply bend the front or rear struts to get the required results. The wing is held on with two small rubber bands which allow the same to jump clear off the struts in a hard collision.
By means of this arrangement the wing may be replaced by another easily.
Since the model has a closed rear hook only 12, 16 or 24 strands can be used. Closer variation in power can be had by using odd sizes of rubber such as 7/64" or 3/32". Here is the procedure to put the rubber in. Cut off a length of rubber according to the number of strands to be used. Tie the two ends making it into a loop. Fold the rubber into half as many strands as the intended number. Get a piece of thin cord about 20 inches long and tie a small screw to one end of it. The screw serves merely as a weight. Now hold the body perpendicular and drop the screw in and over the rear hook. Next turn the body in the opposite direction, letting the string loop over the rear hook and also the screw drop out in the front. Tie one end of the rubber and the string together. Pulling the free end of the string will double the rubber over the rear hook. Untie the string while holding on to both ends of the rubber and hook it to the prop shaft. For the rear hook arrangement here, my thanks to young Buster Kaiser who was the first to be caught by the speed model craze.
Do not be alarmed by the extremely short rubber line. Even using 24 strands, more than 200 turns can be stored with the aid of a winder. This amount will zip the plane over 120 feet away.
Make sure that the thrust line is straight every way. The tail surfaces are not to be warped or adjusted in any case. Diving or climbing tendency is remedied by changing the wing incidence.
Avoid hitting the bare spots and soft landings!
Scanned From April 1938
Model Airplane News
![]()
![]()
[ Home ] [ Previous Plan Pages ] [ Special
Things ] [ Earl Stahl Plans ]